Showing posts with label cake. Show all posts

Tuesday, January 17, 2012

Vive la Bretagne : ICE Revisited

As some of you may remember, I had the pleasure of taking my very first cooking class this past Fall. Ever since attending "Elegant Autumn Desserts" with Chef Vicki Wells at the Institute for Culinary Education in downtown Manhattan, I'd been aching to go back and try my hand on some other delicacies.

The Institute for Culinary Education is located on 23rd street between 5th and 6th avenue, and offers a full range of recreational cooking classes for those interested in cooking, baking, wine and bar-tending, and cheese.

This time around--motivated by the gift of two cooking classes of my choice for Christmas--I decided to opt for a cooking class as opposed to a baking class. People always ask me what I prefer--cooking or baking. I'd have to say that I prefer baking, because it just comes to me more naturally. There seems to me that there is less room for error, and who could say no to working with ingredients like cream, chocolate, and sugar? I do enjoy cooking though, even though it does not come as easily to me.

This time around, I chose Vive la Bretagne, a celebration of tradition Bréton cuisine. The class was taught by Chef Hervé Riou who is an ambassador of Breton cuisine in the United States, representing the Union Culinaire Bretonne. My motivations for taking this particular class were twofold: first, my family originates from Brittany, the northwestern peninsula of France that projects into the Atlantic Ocean, and, second, I was looking to acquire some tricksy cooking skills.

The class was limited to 20 people and was spread over four hours on a Monday morning. The price was reasonable, considering the time in the kitchen, the price of the materials, and the fact that you got to take bags of goodies home. (I have what must amount to three rabbits in my fridge.)

Within our four hours we made Salade de Roscoff (salad of warm seasonal vegetables in an herb vinaigrette), Timbale de saumon aux herbes et fenouil marinée (smoked salmon served with marinated fennel in lemon and creme fouette with shallots confit), Soupe de poisson cotriade (traditional fish soup), Medaillons de veau à la mode d'Iffiniac (sautéed veal medaillons with Muscadet, onion and grated cheese), Coquille St Jacques à la Concarnoise (pan-seared scallops served with a ragout of chanterelles or wild mushrooms and a vermouth reduction), Lapin sauté aux herbes de Bretagnes (rabbit braised with mushroom shallots parsley and a white wine-herb infusion), Flan de St Enogat (flan with marc of cider and apples or pears caramalized), and Traou Mad (traditional butter cake).

Each one was relatively simple to make, and came out looking and tasting divine. Each used tools and ingredients that are easily available and that shouldn't be too much of a drain on the budget.

Look for each recipe as I remake them in the confines of my home kitchen in the next few weeks!

Thursday, December 22, 2011

Traditional German Stollen

Stollen is an essential and traditional flavor in our house at Christmastime. Our family, which is of German ancestry, enjoys at least one stollen every holiday season, with a cup of tea or on a cold evening. The stollen, a traditional German fruitcake, is often baked with a marzipan core and combines candied and dried fruits for a hearty and refined taste. Stollen can sometimes be dry, but is perfect when served with butter or tea. 

Though we used to purchase a season's supply of stollen at a nearby German Delicatessen, Zum Stammtisch, I decided to try my hand at making this traditional European treat. This recipe, originally from Rescue Ranger at GroupRecipes.com, passed down through his family over hundreds of years. The author writes:

[This recipe for] traditional German Christmas Stolen [was] passed down through the ages in my family...[The] original recipe was without the marzipan [and dated from] 1700, but at some point in the 1800s a relative added the Marzipan to the recipe. It has remained ever since. 
While this old-fashioned recipe takes a bit of time and a careful touch, I found it just as satisfying as our store-bought stollen from Germany. I simplified the recipe slightly by using store-bought marzipan, but I've included the recipe fore homemade marzipan as well. You can find prepared marzipan in the baking or holiday aisle.

These cakes make excellent gifts, can be shipped easily, and serve as a tasty but not-overly-rich dessert after a filling holiday dinner.

The Recipe:


2 cakes (.6 oz each) compressed yeast
1 1/2 cups plus 2 tbsps lukewarm milk
2 potions of 3 1/3 cups each flour
1 stick room-temperature butter
1 stick room-temperature margarine
2/3 cup sugar
2 tsps salt
Zest of one lemon
1/2 tsp of almond extract
1 cup sliced almonds
1 cup almonds, rehydrated in rum overnight
1/2 cup each of candied lemon and orange peel
1/2 cup candied or dried cherries
Confectioners' sugar for dusting


For the marzipan:


1 lb almonds, blanched, peeled, and coarsely chopped
3 large egg whites, room temperature
1/4 tsp salt
2 tbsps rosewater (or 4 tsps almond or vanilla extract)
3 to 4 cups confectioners' sugar

Crumble yeast into lukewarm milk and stir until dissolved. Stir in 3 1/3 cups of the flour. Cover and let rise 20 minutes. In a large mixing bowl, beat together the butter, margarine, sugar, salt, 3 1/3 cups of the flour, lemon zest, and flavorings. (Mixture will be very stiff). Add yeast mixture and mix well at slow speed until well combined. Add almonds, drained raisins, and candied peels. Let the dough rest for 30 minutes until increased in volume by about 1/4.

Deflate the dough by turning it out onto a lightly floured surface. Roll the marzipan into a rope and place it in the center of the dough. Fold the dough over to cover it, and pinch the seams together to seal. Place the loaf, seam side down, Repeat with second half of dough.

Transfer breads to greased baking sheets seam side down. Cover and let rise about 30 to 40 minutes or until dough has increased in volume by 1/4. Bake at 330 F about 45 minutes, until golden brown and a knife inserted into bread comes out clean. Wash with melted butter and sift with confectioners' sugar.

To keep the loaves fresh until use, wrap them tightly in plastic wrap, and wait to wash and dust them.

Marzipan Preparation:


Grind the almonds in a blender or coffee grinder -- or with a mortar and pestle -- until they resemble a fine powder. In a bowl, beat the egg whites with salt until frothy. Add the vanilla, almond extract, or rosewater. Sift in the first 3 cups of powdered sugar 1 cup at a time, kneading the mass in the bowl after each addition. Add just enough of the last cup of powdered sugar to form smooth, pliable dough that is not too sticky.

Divide the dough into portions and wrap tightly in plastic wrap. Keep refrigerated in an airtight container up to 8 weeks.

Tuesday, December 20, 2011

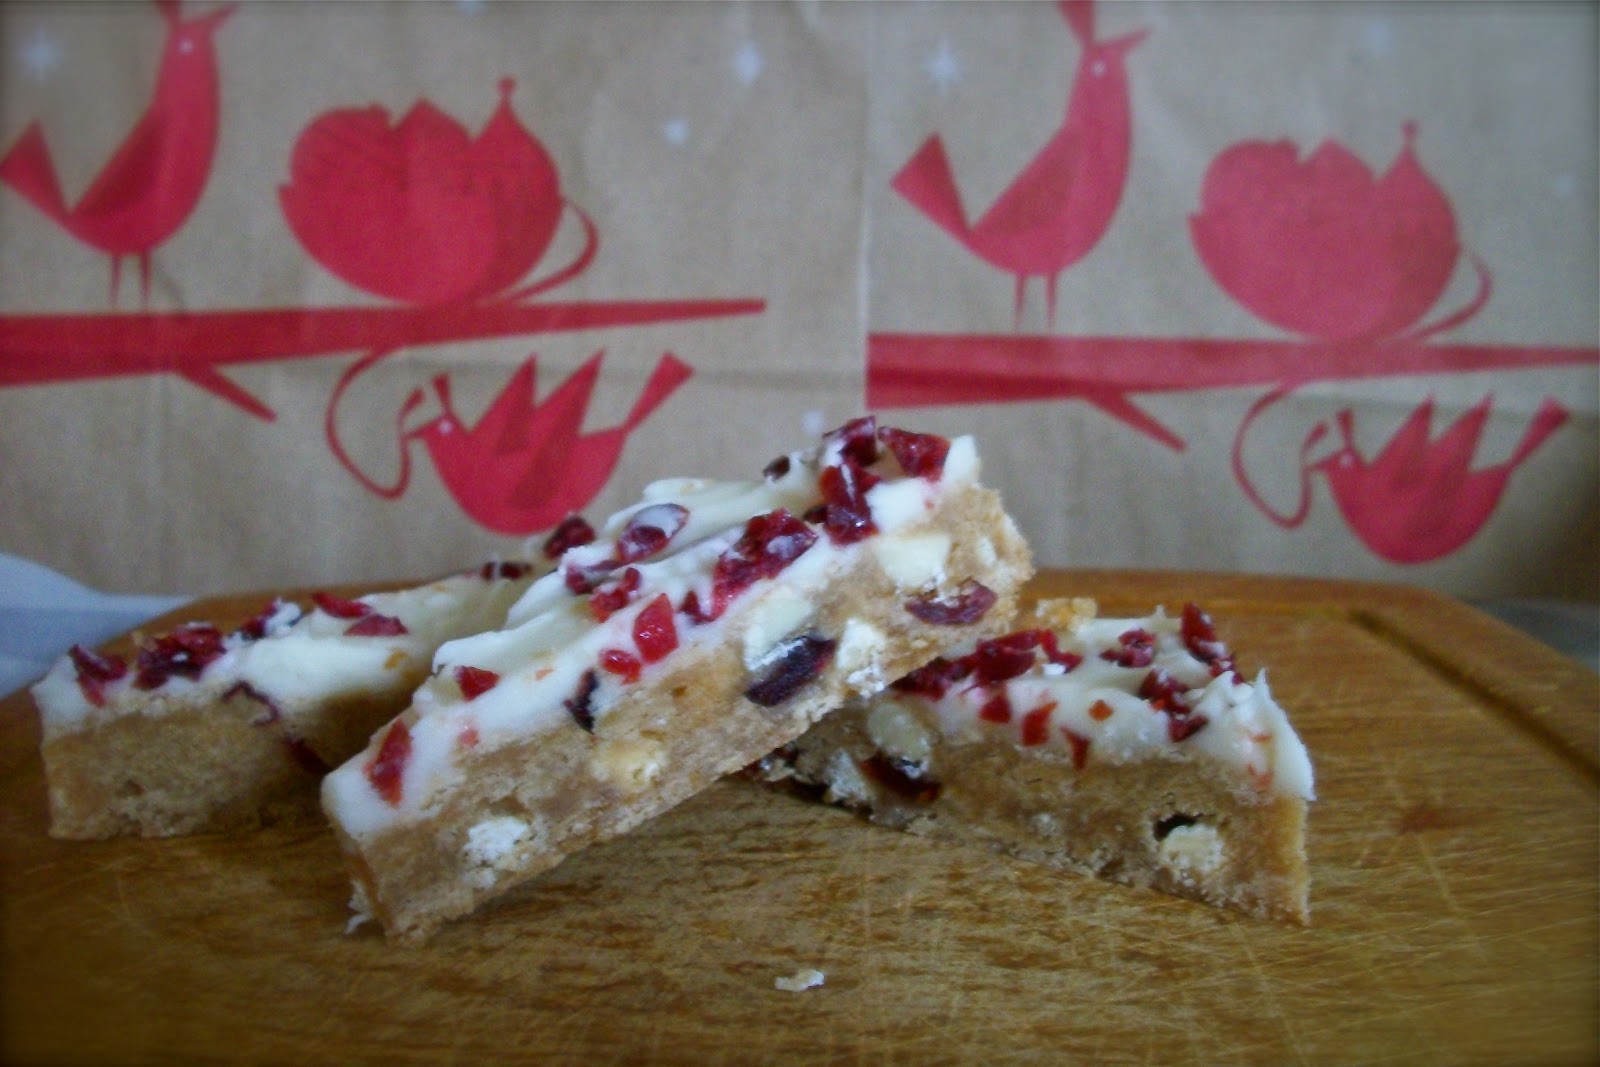
Cranberry Bliss Bars

Every Winter, the global coffee chain, Starbucks, captivates our taste buds with an arsenal of holiday concoctions--from gingerbread and eggnog lattés to peppermint and salted caramel hot chocolate. But Starbucks' holiday charms don't just lie in their wide choice of beverages, but in their selection of baked goods. The cranberry bliss bar is a delicious treat that appears only around the holidays, and that pairs wonderfully with a cup of coffee or cocoa on a wintry day.

While cranberry bliss bars can be a tad bit expensive, this copy-cat recipe will keep your sweet tooth happy without breaking the bank. They even taste the same--so much so, that today I was alternating bites between a "real" bar and one of these and tasted no difference. So, whip up a batch of these, brew a cup of coffee, and let it snow!


The Recipe:


This will make 42 triangle-shaped bars.


For the bars:

1 cup butter (2 sticks, very soft)

1 cup dark brown sugar

1/3 cup sugar

3 large eggs

2 tsps either orange or vanilla extract

2 cups all-purpose flour

1 1/2 tsps baking powder

1 tsp ground ginger

3/4 cup craisins

3/4 cup white chocolate chips


For the frosting:

3 ounces softened cream cheese

2 tbsps unsalted butter

3 cups confectioners' sugar

1 tsp orange or vanilla extract


For the topping:

1/3 cup chopped craisins

1-2 tbsps orange zest

1/3 cup white chocolate chips

1/2 tsp canola oil

Preheat the oven to 350 degrees farenheit and line a 10x15" pan with parchment paper.

Using an electric mixer, cream the butter and sugars together for about three minutes until light. Add each egg one at a time and add the extract. Add the flour, baking powder, and ginger and mix until just incorporated. Add the cranberries and chips and mix.

Spread the batter evenly and bake for 20-25 minutes until brown only at the edges (or until a knife comes out clean). Cool completely.

For the frosting, cream together the cream cheese and butter, then the extract. Then add the confectioners' sugar and beat until fluffy. Spread evenly over the cooled bars.

To make the garnish, sprinkle the zest over the bars and add coarsely-chopped craisins. To make the white chocolate drizzle, mix the and oil in a glass measuring cup and microwave for 1 minute, stirring every 15 seconds until melted. Use a fork or whisk to drizzle the white chocolate diagonally across the bars.

Allow one hour for the white chocolate to set before cutting and refrigerate. Cut into triangles for the signature Starbucks' look!

Tuesday, November 8, 2011

Carrot Ginger Layer Cake with Lemon Cream Cheese Frosting


Yesterday, we celebrated my mom's birthday. She and my father had been away for the weekend, and so I had unfortunately missed the actual day; however, that wasn't going to stop me from surprising her when they got home with an already-cooked dinner and a birthday cake.

My family and I have been suffering from a sugar overload over the past week, which I am fully ready to accept as my own fault. Halloween left in its wake not only a trail of candy wrappers and smashed pumpkins, but a lot of tummies sore from too much indulgence.

Instead of making a sweet and traditional birthday cake laden with fruit and chocolate, I opted for a more modest alternative fitting both to the season and our craving for the savory.

I decided to halve the recipe for Martha Stewart's Carrot Ginger Layer Cake (see the original at http://www.marthastewart.com/344218/carrot-ginger-layer-cake-orange-cream-cheese-frosting?czone=food/cake-center/favorite-cake-recipes ) and make some slight variations in hopes of creating the perfect surprise cake.

In my version, I not only halved the recipe for a smaller (aka *not* four layer) cake, but also used ground ginger instead of fresh and a more savory lemon cream cheese frosting. The cake turned out moist and flavorful, and, above all, not too sweet. My mother was delighted with her celebration. All in all it was a not-so-sweet victory with a great deal of spice!

The Recipe:

For the cake:

1-1/2 cups all-purpose flour
1/2 cup (3 ounces) chopped pecans
1/2 pound large carrots, peeled
2 large eggs, room temperature
1/4 cup buttermilk
1/2 teaspoon pure vanilla extract
1 cup sugar
3/4 cup canola oil
1 tablespoon freshly grated ginger OR 1/2 teaspoon ground ginger and a dash of lemon juice
1 teaspoon baking powder
1/2 teaspoon baking soda
1/2 teaspoon salt
1/2 teaspoon ground cinnamon

For the frosting:

6 oz unsalted butter, room temperature
12 oz chilled cream cheese
1 cup confectioners' sugar, sifted
1 teaspoon lemon extract
2 tablespoons freshly grated ginger OR 1 tsp ground ginger

Heat oven to 375 degrees and lay pecans in a single layer on a baking sheet. Toast until lightly golden, for about 5 minutes. Be sure to check them very frequently as nuts burn fast and without warning. Take them out and let them cool. Reduce oven temperature to 300 degrees.

Meanwhile, using the smallest holes of a grater, grate your carrots and place them in a bowl. Mix together with eggs, buttermilk, vanilla, sugar, canola oil, and ginger until well-incorporated.

In a medium bowl, whisk together flour, baking powder, baking soda, salt, and cinnamon. Using a rubber spatula, fold the flour mixture into the carrot mixture until combined. Fold in the toasted pecans. Divide the misture evenly between two buttered and floured pans.

Bake until a knife inserted into the middles comes out clean, about 30-40 minutes. Remove pans from oven, and transfer to a wire rack to cool, 15 minutes. Turn cakes out onto rack; let stand until completely cool.

Meanwhile, make your frosting by creaming the butter with an electric mixer until fluffy, about 2 minutes. Add cream cheese, and beat until well combined and fluffy, about 2 minutes more. Add sugar, lemon extract, ginger, and salt, and beat for 5 minutes.

Frost your cake and make sure to keep it cool until serving.

Bon appetit!

Monday, October 31, 2011

Floating Ghost Cupcakes


As a grand finale to my Hallo-week of special treats, I have saved the best and (perhaps) trickiest treat for last. These ghostly cupcakes were inspired by a slideshow of Halloween cupcakes on Martha Stewart's website (see the original below!). The cupcakes, which use cupcakes topped with fondant to create ghostly little desserts were too cute not to make.

The original Martha recipe calls for homemade Devil's Food cake, suggests using cupcakes topped with marshmallows as the base for the ghost bodies, and uses store-bought fondant. After reading a variation of the recipe on "Not So Idle Hands," another cooking blog, I decided to combine the two and add some of my own tricks.

I have slightly simplified the recipe by using Devil's Food cake mix, and mini cupcakes instead of marshmallows. I also decided to follow Emily's advice from "Not So Idle Hands" and make my own marshmallow fondant rather than buying expensive fondant from the store.

The recipe below is my own interpretation of the Martha and Emily combination.

The Recipe:

1 box Devil's Food cake mix
1 pound of marshmallows
1.5 boxes of confectioner's sugar
1/2 cup of shortening (to grease your hands and the counter)
2-5 Tablespoons of water
24 chocolate-candy-coated sunflower seeds, for eyes

First, make your marshmallow fondant several hours before the cupcakes.

Take your marshmallows and put them in a very large bowl. Sprinkle them with 3-4 Tbsps of water and microwave them 30 seconds at a time, stirring vigorously between heatings, until they are melted and smooth. Then, add the majority of your sugar and stir as much as you can. Grease a surface with lots of Crisco to prevent sticking. Also make sure you grease your hands, as you will be kneading the dough. Plop the mixture down and knead it until well incorporated. As you go along, add the rest of the sugar and as much Crisco as you need to keep it tame. Then, wrap the fondant in plastic and refrigerate for several hours.

In the meantime, carve some pumpkins, finish your costume, and start baking your cupcakes.

Make your cake mix as directed. To make the ghost bodies, you will need an equal number of large and mini cupcakes. The large cupcakes will be the bases, and the mini cupcakes will be attached for the upper part of the bodies. Let the cupcakes cool.

Once they are cool, cut the puffy tops with a sharp knife to make them level. Then, you can glue them together with either frosting or a toothpick.


After it has chilled, roll the fondant out on your counter, using cornstarch to keep it from sticking. Roll it as thin as you can without it tearing (you don't want it to be too heavy for the cupcakes). You might try breaking it up into 4 sections while rolling, to prevent them from drying out. (If it dries, microwave it for 10 seconds at a time and knead in a tiny bit more shortening.)

Now, it's time to cut out circles for the ghost capes. Use a bowl, cup, or circular object to cut circle shapes. Take the circles of fondant and drape them over the cupcake towers. Arrange it so that the folds of the cape look flowy and polished. Once done arranging the fondant, give the ghosts eyes and mouths by pressing sunflower seeds to them or by using icing to draw faces.

Let fondant harden slightly at room temperature before serving.


Check out another attempt / variation on these ghosts at :
http://www.marthastewart.com/333111/ghost-cupcakes?czone=holiday/halloween-center/halloween-center-desserts
http://notsoidlehands.blogspot.com/2009/10/spooky-cupcake-ghosties-plus-easy.html

Wednesday, September 14, 2011

Two Words : Strawberry Cheesecake


My boyfriend Alex's birthday was fast approaching, and I had no idea what to make him. Last year, I had truly outdone myself with a ridiculous chocolate cake from Epicurious--the Mile High Chocolate Cake, which comprises four layers of chocolate glued together with butter and more chocolate. This year, I wanted to do something different, but I wasn't sure what. I flipped through the photos of to-die-for cakes on the Food section of Pinterest trying to find something. Finally, I stumbled upon a photo of a chocolate cake that eventually led me to another cake entirely--Martha Stewart's Strawberries and Cream Cheesecake.

I love strawberries. I love cheesecake. What deranged person doesn't? (Well, I know some people but we won't talk about them). Alex, being an intelligent human being, also loves strawberries and cheesecake, especially when they are combined.

The cake was pretty labour-intensive and must have used every pan / bowl in my broom-closet-sized kitchen, but hot damn, it was good.

I've made cheesecakes before, but they were always too dry and not as delicious and when I had gotten them from New York landmarks such as Junior's or Zaro's. The trick with this cheesecake was the way in which it was baked. When I first read the instructions, I had one of those, "Wait...what...?" moments. I read the steps about 3 times, feeling my blonde hair absorbing all my intelligence, until I realized that while it sounded terrifying, the step was probably not so bad in practice. Martha instructs that you wrap a springform pan in 2 layers of tin foil, place it in a roasting pan, and fill the roasting pan with boiling water until it reaches half way up the springform (O_O). But, once you do it, it's not too hard. My kitchen was not equipped with a baking pan large enough to accommodate my springform, so I did it gangsta style: in a cast iron frying pan.

The cake was per-fect. In every way. The strawberry layer was superb, the mascarpone cheese made it taste like a real, authentic, restaurant-quality cheesecake. My boyfriend's eyes rolled back with delight, his new roommates realized I was worth keeping around, his sister, with whom I have a gentle baking competition, admitted defeat and I got a piece of cheesecake.


The Recipe:

Ingredients:

1 pound strawberries, hulled
3 tablespoons light corn syrup (*alternative: I substituted honey for corn syrup and it was delicious!*)
1 cup finely ground graham crackers (about 4 sheets)
1 cup plus 3 tablespoons sugar
3 tablespoons unsalted butter, melted
1 pound plus 13 ounces cream cheese, room temperature
1/4 teaspoon salt
2 large eggs, room temperature
1 vanilla bean, seeds scraped and reserved (you can also use 3 tsps of vanilla extract if you cannot find / afford vanilla bean)
8 1/4 ounces mascarpone cheese, room temperature

Steps:

Preheat oven to 300 degrees. Place strawberries in a single layer on a rimmed baking sheet. Drizzle with corn syrup, and toss gently to coat. Bake until syrup thickens and strawberries turn deep red and shrink slightly, about 1 hour 30 minutes. Transfer strawberries and syrup to a medium bowl, and mash with a potato masher. Let cool completely.

Raise oven temperature to 350 degrees. Stir together graham cracker crumbs, 3 tablespoons sugar, and the melted butter in a small bowl. Press mixture into the bottom of a 9-inch springform pan to make an even layer. Bake until crust is firm to the touch and has just darkened, about 10 minutes. Transfer pan to a wire rack, and let crust cool completely.

Reduce oven temperature to 325 degrees. Put cream cheese into the bowl of an electric mixer fitted with the paddle attachment; mix on medium-low speed until creamy, about 2 minutes. Scrape down sides of bowl, then gradually add remaining cup sugar and the salt. Scrape down sides of bowl; add eggs, 1 at a time, mixing well after each addition. Scrape down sides of bowl, and mix in vanilla bean seeds and mascarpone until very creamy and no lumps remain, about 3 minutes. (Reserve vanilla bean for another use.)

Transfer 5 cups cream cheese mixture to bowl with mashed strawberries; stir to combine. Pour strawberry-cream cheese mixture on top of crust; smooth with an offset spatula. Carefully spoon dollops of plain cream cheese mixture on top, smoothing with an offset spatula.

Wrap the exterior of the springform pan in 2 layers of foil; set in a large roasting pan. Fill roasting pan with boiling water until water reaches halfway up the sides of the springform pan. Bake cheesecake until set, about 1 hour to 1 hour 10 minutes. Remove springform pan from water bath, and transfer to a wire rack to cool. Refrigerate until cold, at least 4 hours (up to overnight).

Voila!


Recipe courtesy of Martha Stewart Online: http://www.marthastewart.com/340256/strawberries-and-cream-cheesecake